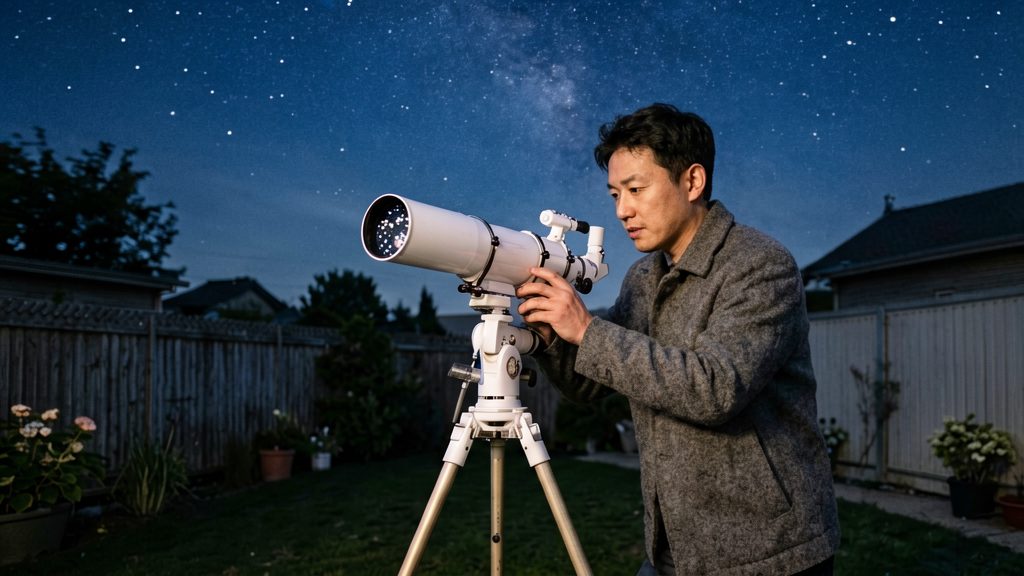
What is a smart telescope?
Built-in motorized mount, camera, and plate-solving
In a smart telescope, the optics, mount, and camera are fixed together in one housing. The motor drives the mount so the telescope can track a target as the sky turns, and the camera captures the image.
Plate-solving is the step that tells the device where it is pointing. The unit compares the stars visible in a frame against a star map, works out which part of the sky it is seeing, and corrects the mount’s position. In a manual setup, you do this by hand with a finder scope, a handset, or a computer.
Sensors differ by model:
- The ZWO Seestar S30 Pro carries two cameras, an IMX585 for deep-sky targets and an IMX586 for wide-angle views (Fstoppers, 2026).
- The DwarfLab Dwarf Mini uses a 2 MP IMX662 sensor (Fstoppers, 2026).
- The DwarfLab Dwarf 3 uses an 8.3 MP IMX678 sensor (Fstoppers, 2026).
On-device stacking of live frames
On-device stacking means the unit captures many short exposures, aligns them, and adds them together while the session runs. The image on your phone brightens as frames accumulate, so you can see faint detail without waiting for post-processing on a computer.
Storage and exposure settings affect how many frames you keep. The Seestar S30 Pro has 128 GB of storage (Fstoppers, 2026).
Phone app as the sole control interface
On a smart telescope, the phone app replaces the handset, the laptop, and the stacking software. You use it to pick a target, frame the view, start and stop capture, and review the stacked result.
App quality varies. Fstoppers (2026) says the Seestar app is the most mature in the category, while the Dwarf 3 app has a steeper learning curve for night-only use.
Automated versus manual setups
| Task | Manual setup | Smart telescope |
|---|---|---|
| Mount | Separate mount that you align and drive | Motorized mount built into the unit |
| Finding a target | You locate it with a finder or handset | The app selects the target and slews the mount |
| Image capture | Separate camera, often with a laptop | Built-in camera, controlled from the app |
| Stacking | Done afterward in stacking software | Done on the device as frames arrive |
| Control | Handset or computer | Phone app only |
Best smart telescope for beginners in Canada
The ZWO Seestar S30 Pro is a strong starting candidate for Canadian beginners, though guides disagree on the overall winner and no Canadian source was verified. Fstoppers (2026) rates it Best Overall and recommends it as a first smart telescope. The Vaonis Vespera II is the step up in image quality, and the Celestron Origin Mark II and Unistellar Odyssey Pro are premium options with trade-offs in weight and cost. Check current CAD prices, stock levels, and shipping or duties at Canadian retailers before you buy.
| Model | Optics | Main trade-off |
|---|---|---|
| ZWO Seestar S30 Pro | 30 mm aperture, 160 mm focal length, two cameras (IMX585 for deep-sky, IMX586 for wide-angle) | 1.65 kg, built-in dual-band filter, 128 GB storage |
| Vaonis Vespera II | 50 mm apochromatic quadruplet, 8.3 MP IMX585 sensor | Clear image-quality step up from compact models, costs several times as much |
| Celestron Origin Mark II | 6-inch RASA, f/2.2 | About 41.6 lb, heavy and bulky |
| Unistellar Odyssey Pro | 85 mm mirror, includes an eyepiece | Among the most expensive options in the guide |
Best Overall: Seestar S30 Pro
The dual-camera setup is what separates the S30 Pro from single-sensor compact scopes. The IMX585 handles deep-sky targets, and the IMX586 covers wide-angle framing, so you can switch between a faint nebula and a large star field without changing hardware. The built-in dual-band filter is useful for beginners observing from a light-polluted location.
At 1.65 kg, it is light enough to set up on a patio or balcony. Fstoppers’ praise for its app maturity matters most for a first telescope, because the app handles pointing, tracking and image stacking, which are the steps beginners find hardest.
Image-quality step up: Vespera II
The Vespera II is the choice when you want sharper results than the compact models deliver. Its 50 mm apochromatic quadruplet and 8.3 MP IMX585 sensor give it more optical capability than the S30 Pro’s 30 mm aperture. Fstoppers (2026) notes that it costs several times as much as the compact models, so buy it only if the image quality justifies the extra spend. The Vespera Pro 2 is not recommended for most beginners.
Premium options: Origin Mark II and Odyssey Pro
The Origin Mark II is a 6-inch RASA at f/2.2 that weighs about 41.6 lb (about 18.9 kg), making it hard to move between locations.
The Odyssey Pro is the only model in this comparison with an eyepiece, which suits visual observers who want to look through the telescope as well as image. Its 85 mm mirror makes it one of the most expensive options in the guide.
Seestar S30 Pro or Dwarf 3: which should you pick?
The Seestar S30 Pro and the DwarfLab Dwarf 3 differ most in how they split their work. The S30 Pro is built around night-sky imaging with two cameras, while the Dwarf 3 is also rated for daytime wildlife use. According to Fstoppers (2026), the S30 Pro is the top pick for a first smart telescope, and the Dwarf 3 suits buyers who want outdoor use in addition to astronomy. Choose the S30 Pro for night-sky imaging, and the Dwarf 3 if you plan to point it at animals or outdoor scenes too.
Aperture, focal length and sensor trade-offs
| Specification | Seestar S30 Pro | Dwarf 3 |
|---|---|---|
| Aperture | 30 mm | 35 mm f/4.3 |
| Sensors | IMX585 (deep-sky) and IMX586 (wide-angle) | IMX678, 8.3 MP |
- Aperture sets how much light the scope collects. The Dwarf 3’s 35 mm aperture has about 1.36 times the light-collecting area of the S30 Pro’s 30 mm (35 ÷ 30, squared). This is a real but modest gain, so it rarely decides the choice on its own.
- The S30 Pro lists a 160 mm focal length. The Dwarf 3’s focal length is not verified here, so check its product specification before comparing fields of view.
- The S30 Pro’s two cameras give it a wide-angle view and a deep-sky view. The Dwarf 3 is listed with an 8.3 MP IMX678 sensor; check the manufacturer’s specification for any additional cameras.
Daytime use versus night-only imaging
The Dwarf 3 works for both daytime wildlife and night imaging, according to Fstoppers (2026). Treat the S30 Pro as a night-sky instrument unless its manufacturer documentation says otherwise. The Dwarf 3’s app also has a steeper learning curve than the Seestar’s for night-only use.
IP54 and outdoor durability
The Dwarf 3 carries an IP54 rating. IP54 is an ingress-protection code: it indicates limited dust ingress and protection against splashing water, not full waterproofing or immersion. Check the Dwarf 3 documentation for the operating conditions. Check the Dwarf 3 documentation for what the rating covers and what operating conditions apply.
Is a budget smart telescope good enough?
The DwarfLab Dwarf Mini is the budget entry in Fstoppers’ 2026 guide, and it is built for people testing the hobby. It has a 30mm aperture, weighs 840 g, and carries a 2 MP IMX662 sensor. In equatorial mode it allows 90-second exposures and runs for about 4 hours on battery. Fstoppers says it suits first-time users but warns of lower resolution and cropping limits. Whether it is “good enough” depends on what you want to image and how much you are willing to crop.
What the 2 MP sensor means in practice
A 2 MP sensor records far fewer pixels than the 8.3 MP sensors in the Dwarf 3 and Vaonis Vespera II. Fewer pixels means less detail when you crop in. Field of view depends on sensor size and focal length, so check the manufacturer’s specification. Fstoppers flags this as the main limit of the Dwarf Mini.
- Cropping: Expect to crop tightly on small targets such as planetary moons or compact galaxies. Each crop reduces the detail you can recover.
- Framing: Wide targets such as large nebulae may fit comfortably, but you will get fewer pixels across the object.
- Upgrade signal: If you find yourself cropping most of your frames, the sensor is the constraint, not your technique.
Exposure and battery in the field
The 90-second equatorial exposure limit sets the length of each sub-frame. Stacking many short frames is how beginners build up signal, so plan your session around that number. The roughly 4-hour battery figure from Fstoppers is a practical guide for a single night, but cold conditions can shorten runtime; check the manufacturer’s notes for your temperature range before a long session.
Targets that suit a low-resolution sensor
Choose objects that are bright and large enough to fill the frame without heavy cropping:
| Target type | Why it suits a 2 MP sensor |
|---|---|
| Moon | Bright and large in the frame; detail is limited by pixel count, so frame it tightly but expect modest resolution |
| Large, bright nebulae | Extended objects can suit a low-resolution sensor; check the field of view in the manufacturer’s specification |
| Bright star clusters | Compact and high in brightness, so short exposures capture them well |
Faint, small galaxies and fine planetary detail are poor matches for this sensor, because they need either more resolution or longer total exposure than a budget setup comfortably delivers.
Smart telescope or phone: what should you start with?
A phone is the cheapest way to test astrophotography, since you already own the camera. A smart telescope costs more but tracks the sky and stacks many frames automatically, which is what makes faint deep-sky objects visible on a screen.
What a phone can and cannot capture
Phone night modes combine several short frames to reduce noise, which works for bright targets such as the Moon and brighter stars. Faint nebulae and galaxies usually need exposures longer than a handheld phone can hold steady, and the sky keeps moving during those exposures. Expect the Moon to be the most rewarding phone target, and expect stars to appear as points only if the phone stays still.
Tripod, clip and tracking requirements
- Tripod or clip: a phone on a rigid tripod or clip prevents shake, but it does not follow the sky.
- Sky tracking: an equatorial mount rotates the camera to counter Earth’s rotation. Without it, long exposures show star trails.
Cost per session and learning curve
Phone sessions cost nothing beyond the time spent, but results plateau quickly. A smart telescope adds a per-session cost in battery charging.
Light-pollution filters, dark sites and dew control
Light pollution and cold affect smart telescope results in different ways, so they need different fixes. Light pollution is handled with filter choice and site selection. Cold is handled with dew control and power planning. Fstoppers (2026) notes that under light pollution, a filtered compact scope often delivers most of the results for much less money than a larger setup.
Choosing a light-pollution filter
Filter status varies by model, so check it before buying. According to Fstoppers (2026):
| Model | Light-pollution filter status |
|---|---|
| ZWO Seestar S30 Pro | Built-in dual-band filter |
| Celestron Origin Mark II | Ships without a light-pollution filter |
A dual-band filter is designed to block much of the artificial light from urban skies while passing specific emission wavelengths from nebulae. A built-in filter removes the need for a separate accessory. If your model ships without one, budget for a compatible filter and confirm the thread or mounting size with the manufacturer before purchase.
Selecting a dark-sky site
The Bortle scale rates how dark a location’s night sky is, with lower ratings indicating darker skies. Use it to compare sites, not as a precise measurement of your own sky. To choose a site:
- Check a light-pollution map for locations within practical driving distance.
- Visit candidate sites on a clear night and compare the faintest stars you can see.
- Choose a site with a clear view of the horizon, away from streetlights and building glare.
- Contact a local astronomy club, which often knows which nearby sites are well suited to observing.
Dew and cold-temperature power
Dew forms on the front optic when it cools to the air’s dew point, which can ruin a session within minutes. Practical steps:
- Check whether your model includes a dew heater or accepts an accessory one. Confirm the heater’s power requirement in the manufacturer’s manual.
- Use a dew shield or cap when the scope is not imaging.
- Keep the telescope covered between sessions and let it adjust gradually when moved from a warm room to cold air.
Which smart telescope suits you?
Start with your sky, then your goal, then your budget. Buy the cheapest scope that fits your sky and goals, and upgrade only if the hobby sticks.
Decision path by goal
- Deep-sky targets (galaxies, nebulae, star clusters): Choose a model with a dedicated deep-sky camera and a built-in filter. The ZWO Seestar S30 Pro has an IMX585 deep-sky camera and a built-in dual-band filter.
- Daytime wildlife plus night imaging: The DwarfLab Dwarf 3 is rated for both uses.
- Planets and visual observing: Check each model’s maximum magnification and tracking stability in the manufacturer’s documentation before buying for planetary targets. If you want to look through an eyepiece as well as image, the Unistellar Odyssey Pro is the only model in this group with one.
Matching budget tiers to models
Tiers below are indicative only: Fstoppers gives no prices, so check current Canadian retailer listings (CAD, stock, shipping and duties) before deciding.
| Tier | Model | Fit |
|---|---|---|
| Entry | DwarfLab Dwarf Mini | Suits people testing the hobby; expect lower resolution and cropping limits |
| Mid | ZWO Seestar S30 Pro | Two cameras, built-in dual-band filter, 128 GB storage |
| Mid | DwarfLab Dwarf 3 | 35mm f/4.3 aperture, 8.3 MP IMX678 sensor, day and night use |
| Premium | Vaonis Vespera II | 50mm apochromatic quadruplet, 8.3 MP IMX585 sensor; a clear image-quality step up |
| Premium | Unistellar Odyssey Pro | 85mm mirror, the only eyepiece model in this group |
| Heavy premium | Celestron Origin Mark II | 6-inch RASA at f/2.2, about 41.6 lb |
Final shortlist: one model per profile
- Beginner, light-polluted sky, deep-sky targets: ZWO Seestar S30 Pro
- Tight budget, testing the hobby: DwarfLab Dwarf Mini
- Daytime wildlife plus night imaging: DwarfLab Dwarf 3
- Upgrading image quality from a compact scope: Vaonis Vespera II
- Eyepiece observing alongside imaging: Unistellar Odyssey Pro